Proportional Caliper Device— H-4216Use to determine the percentage of flat particles, elongated particles, or both flat & elongated particles in coarse aggregates. Steel construction for strength & durability, plated for corrosion resistance. 6" x 16" (152.4 x 406.4mm) base plate with four rubber feet for stability, and for convenience in tabletop testing. Ratio desired is obtained by selecting one of four adjustable positions: 2 = l:2; 3 = 1:3; 4 = 1:4; or 5 = 1:5. Meets ASTM D4791. It is recommended that the desiredprocedure be reviewed carefully prior to conducting the test. Meets ASTM D4791. |
 |
Elongation Index for Classification of Aggregate Particles— H-1682For determining elongation index. Particle is elongated when its length (longest dimension) is more than 1.8 of the midsize of the sieve fraction. Aggregate to be classified is separated into seven sieve fractions from 63 to 6.3mm, and each fraction is examined separately. Six labeled openings between pairs of metal pins measure particle from each of the six sieve cuts below 50mm. The mass of all elongated particles (failing to pass between pins) as percent of the sample is the elongation index. Meets BS 812. |
 |
Flakiness Gauge for Classification of Aggregate Particles— H-1684For determining flakiness index. Particle is flaky when its thickness (smallest dimension) is less than 0.6 of the mid-size of the sieve fraction. Gauge has seven labeled slots for rapid hand trying of particles from each of the seven sieve cuts. The mass of all flaky particles (passing appropriate slots) as percent of the sample is the flakiness index. Meets BS 812. |
 |
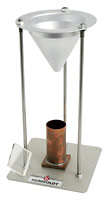
Void Content Apparatus, Fine Aggregates— H-1680AUse to determine the uncompacted void content of a fine aggregate sample. Indicates the angularity, sphericality, and workability of fine aggregate in a mixture. Includes 100 ml brass cylindrical measure, funnel assembly, funnel stand, and glass plate for calibration. Meets ASTM C1252, AASHTO TP33. Shipping wt. 10 lbs. (4.5kg) |
 |
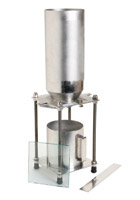
Void Content Apparatus, Coarse Aggregates— H-1686Used to determine the void content of uncompacted coarse aggregates used in HMA applications. When used on aggregates of a known size, the void content provides the user with an indication of the angularity, sphericity and surface texture as compared to other course aggregates of the same grading. In operation, the aggregate is allowed to free-fall 115mm from the funnel bottom into a 154mm diameter by 160mm high cylindrical measure. The excess heaped aggregate is struck of using the included bar, the mass is measured, and the void content is computed. The apparatus consists of a stainless steel hopper, stand, measure and strike-off bar and a 170mm square glass plate for calibration of the measure. Meets AASHTO TP56. Order overflow pan and material handling scoop separately. |
 |
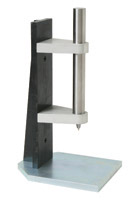
Scratch Hardness Tester— H-3420Scratch Hardness Tester determines quantity of soft particles in coarse aggregates on basis of scratch hardness. Apparatus consists of 1/16" (1.6mm) dia. brass rod with rounded point inserted into plunger. Overall weight of brass point and plunger is 2 ±0.1 lbs (8.9 ±0.4N). Plunger is mounted on support stand, permitting plunger to lower and raise freely. Furnished with one extra brass scratch rod. Meets ASTM C851. Shipping wt. 9 lbs. (4kg) |
 |

