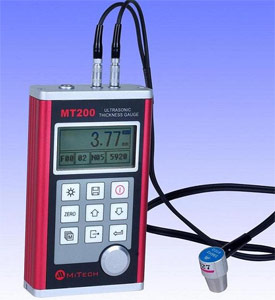
Overview
The Mitech model MT200 is a digital ultrasonic thickness gauge. Based on the same operating principles as SONAR, the MT200 is capable of measuring the thickness of various materials with accuracy as high as 0.01 millimeters, or 0.001inches. It is suitable for a variety of metallic and non-metallic materials.
Product Specifications
Display:128×64 dot matrix LCD with EL backlight.
Measuring Range:0.75~300mm (in Steel).
Sound Velocity Range: 1000~9999 m/s.
Resolution:0.1/0.01mm(selectable).
Accuracy: ±(0.5%Thickness+0.04)mm
Units: Metric/English unit selectable.
Four measurements readings per second for single point measurement, and ten per second for Scan Mode.
Memory for 20 files (up to 99 values for each file) of stored values.
Upper and lower limit can be pre-set. It will alarm automatically when the result value exceeding the limit.
Power Supply:Two “AA” size, 1.5 volt alkaline batteries. 100 hours typical operating time (EL backlight off).
Communication:RS232 serial port.
Case:Extruded aluminum body suitable for use under poor working conditions.
Outline dimensions:132H X 76.2W mm.
Weight:345g
Main Functions
Capable of performing measurements on a wide range of material, including metals, plastic, ceramics, composites, epoxies, glass and other ultrasonic wave well-conductive materials
Four transducer models are available for special application, including for coarse grain material and high temperature applications.
Probe-Zero function, Sound-Velocity-Calibration function
Two-Point Calibration function.
Two work modes: Single point mode and Scan mode.
Coupling status indicator showing the coupling status.
Battery information indicates the rest capacity of the battery.
Auto sleep and auto power off function to conserve battery life.
Optional software to process the memory data on the PC.
Optional thermal mini-printer to print the measured data via RS232 port.
Measuring Principle
The digital ultrasonic thickness gauge determines the thickness of a part or structure by accurately measuring the time required for a short ultrasonic pulse generated by a transducer to travel through the thickness of the material, reflect from the back or inside surface, and be returned to the transducer. The measured two-way transit time is divided by two to account for the down-and-back travel path, and then multiplied by the velocity of sound in the material. The result is expressed in the well-known relationship:
Where:
H-Thickness of the test piece.
v-Sound Velocity in the material.
t-The measured round-trip transit time.
|


